In this current generation, AI appears to be the dominant evolution. With the latest AI generative breakthrough, you can do almost anything without spending much.
These days, you can generate anything with just a prompt.
With the latest CapCut upgrade, you can now generate free AI images for your projects or any other use.
Let’s assume you have a blog post in which you wish to include images, but you don’t know how to obtain them. With CapCut’s image generator, your problems are solved.
So, in this post, we will delve into the steps on how to use CapCut to generate images you can use in your project or for any other purpose.
Please note that this tutorial is primarily for those using Android devices. However, it’s also available for iOS and Windows users, so if you have a different operating system (OS) from Android, you have nothing to worry about.
Let’s get started.
Step #1: Download/Launch CapCut Video Editor
You’ll need to download the CapCut video editor if you don’t already have it. If you do have it, all you’ll need to do is launch the application.
Step #2: Locate Text to Image
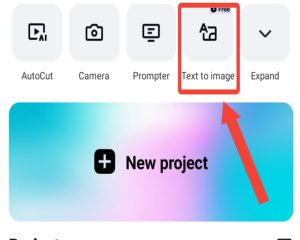
At the top of your device, locate the Text to Image icon. Click on it, and you’ll be directed to the image generator’s interface.
Step #3: Enter your Prompt
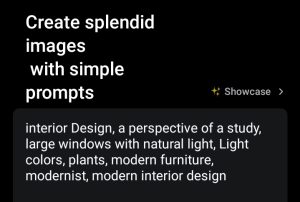
On the screen, you’ll see an example prompt: “metaverse, futuristic city, virtual world, white, hyper realism, hyper-realistic, 8k, soft light, cinematic, hyper-realistic, low-contrast film, 4k, 8k resolution.” Or another just like you saw in the image above. You simply need to edit it by highlighting and clearing it. This is the time to enter your own prompt.
Why You Should Shun the Word Fuse App and Embrace Video Editing
Step #4: Generate your Image
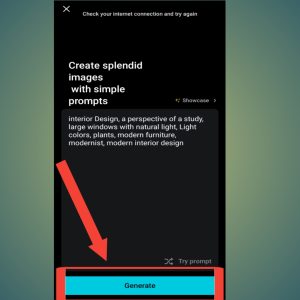
If you are satisfied with the prompt you have provided CapCut, click on the Generate button located below the device.
CapCut will take some time to generate four images related to your request.
Now, if you are not satisfied with what you see, you are free to modify your prompt to get your desired AI-generated image.
To achieve this, click on “Modify” below the already generated images. Once you’re satisfied with the new images, you can save them to your device.
Step #5: Save your Image
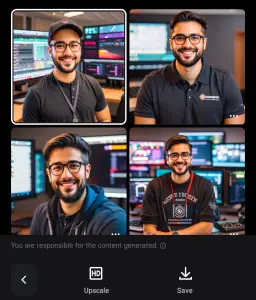
To save your CapCut generated image, click on the image, and you’ll be prompted to save it. Click on “Save,” and that’s it. Your image has been saved to your gallery, and you can use it however you please.
Please note: Images generated with CapCut are free. However, you’ll be responsible for how you use them.
According to CapCut’s Terms of Service: “You are solely responsible for the content generated based on your inputs.
You acknowledge that this feature may provide you with content generated by AI models based on your inputs. As a prerequisite for using this feature, you agree to abide by CapCut Community Guidelines. You bear the ultimate responsibility for the final version of this video content. Any content generated using this feature is not endorsed, sponsored, or approved by CapCut. The generated contents are solely for your personal, non-commercial use through your use of the Services and solely in compliance with CapCut’s Terms of Service.
To report any concerns or issues regarding the AI-generated content produced by this feature, please email us at capcut. support@bytedance.com.”
Disclaimer: Please note that some of the links here are affliate links. We will get commission when you purchase item(s) using any of the links provided here. This does not imply any additional cost to you.
