
Adding keyframes in Capcut is another feature that has made the mobile video editor stand out among other editors.
In this article, we are going to learn how to add keyframes in videos while editing on Capcut.
Before we continue, it will be necessary we understand what the keyframe is all about.
What is a Keyframe?
A keyframe is a specific point or frame within a video or animation where you define the values of attributes or properties. Keyframes are used to create smooth transitions or animations over time.
By setting keyframes at different points, you can specify changes in parameters such as position, scale, opacity, or colour. These changes gradually take place between keyframes, creating fluid animations or effects.
Keyframes are essential in creating dynamic and visually appealing videos and animations, allowing you to control the behaviour and appearance of elements over time.
Haven understood what Keyframe is all about, let’s now see how to add it to our videos while editing with Capcut.
How to Add Keyframes on Videos Using Capcut

Step 1. Import Video
The first step you must follow is the importation of the video clip or footage you want to apply the Keyframes to. It is still okay if you are already working on any footage or clip.

Step 2. Click on the footage on the timeline
After you have added the video to the timeline, you will need to click on the clip to highlight it.
Step 3. Scroll to identify the area you want the effect to start
You will need to identify the area you wished to add the special effect to the video.
To achieve this, you’ll need to scroll the footage on the timeline and ensure that the playhead is positioned or situated at the point where you want the effect to take place.
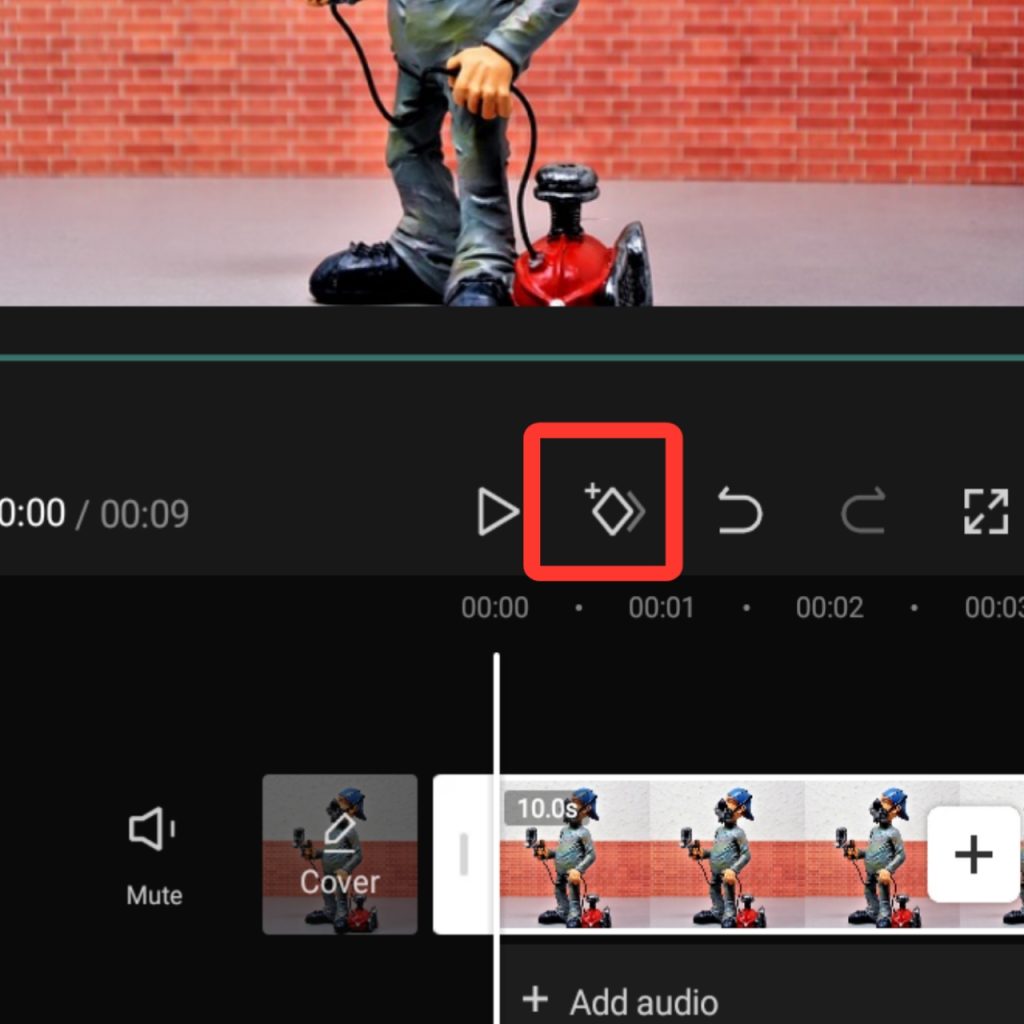
Step 4. Add Keyframe
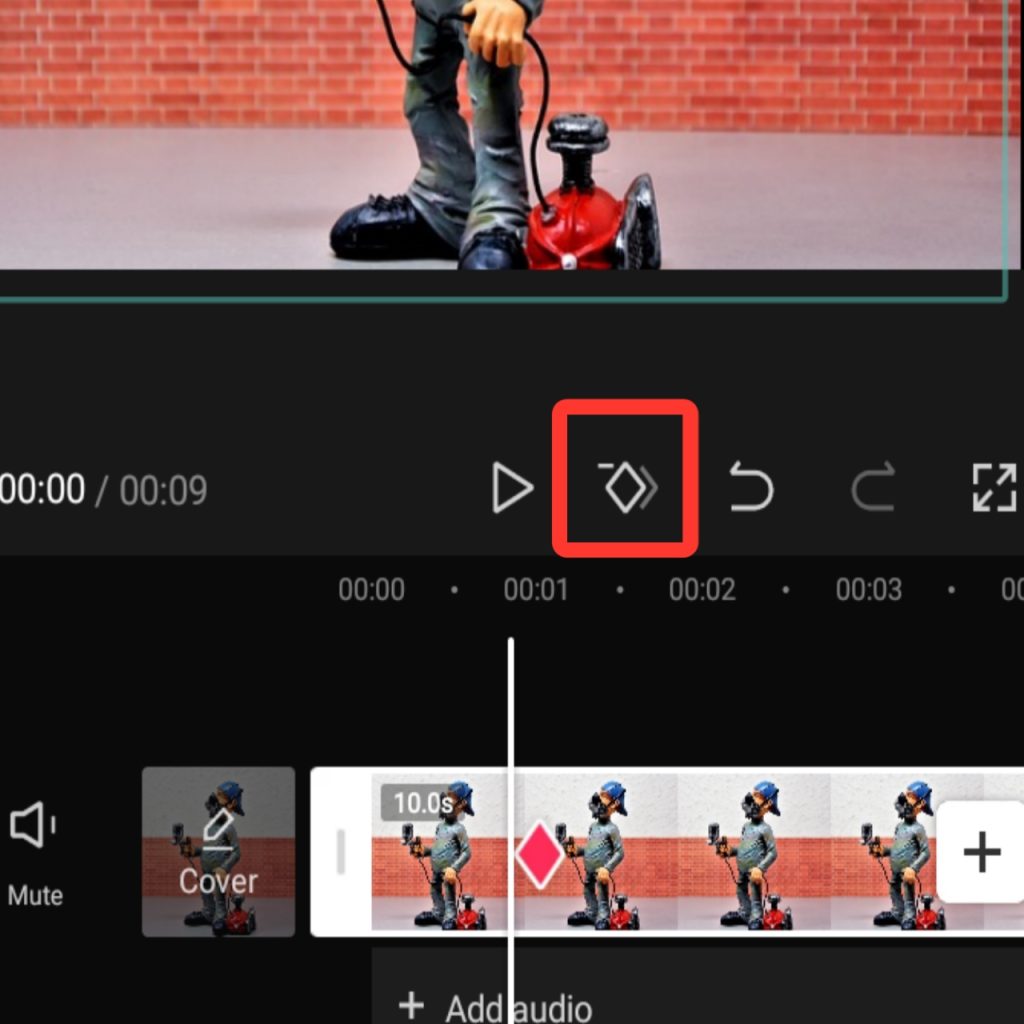
This is where it gets interesting. To add the Keyframes, you will notice a rhombus with a positive or plus sign positioned at the right very close to the play button. I will click on it to trigger the Keyframe.
To add more keyframes, all you will need to do is to move the video on the timeline and add more keyframes. Repeatedly do this to add more keyframes.
How to remove Keyframes
To remove Keyframes, I would repeat step two of the above instruction. The next thing to do is to identify the Keyframe you want to remove and hit the rhombus icon with a minus or negative sign.
You can as well remove the keyframes by clicking the undo button.
However, the safer way to remove the keyframes is by moving the footage on the timeline and clicking the rhombus icon with a minus sign.
Wrapping Up: How to add Keyframes Using Capcut Video Editor
Adding keyframes in a video is to determine where a special effect will start and where it should end.
Doing this with Capcut is super easy and super cool. Feel free to explore this new thing you have learnt.
You are also welcome to ask your questions as much as it regards adding or removing keyframes on Capcut.
Also, please feel free to reach out to us via email if you want us to edit any video for you at an affordable price.
