
Capcut, a remarkable mobile video editor, continues to dominate the market with its exceptional editing capabilities.
This article aims to provide a step-by-step tutorial on how to make objects smoothly transition from one side of the video screen to another using Capcut.
With this powerful application, you can effortlessly transform your videos into professional-grade content. So, let’s dive in and explore the process together.
Getting Started
Please note that some of the links provided in this article are affiliate links. By purchasing through these links, you won’t incur any additional charges. We recommend using the provided links to enjoy exclusive discounts
To begin, familiarize yourself with the visual demonstration of the process by watching our accompanying video. If you prefer reading, feel free to follow along with the article.
Moving Objects in Capcut
Step 1: Import Your Video

Start by importing your video(s) into Capcut and initiate the editing process.
Step 2: Select the Timeline Video

To enable object movement, highlight the desired video on the timeline by simply tapping on it.
Do you know that smartphones with low specifications can frustrate your video editing experience? In order to avoid this, I think you’ll need an upgrade. So check this smartphone out.
Step 3: Determine the Object’s Starting Point
Decide where you want the object to commence its movement. This can be at the center, middle, or any other specific location within the video.
Step 4: Access the Keyframe Icon
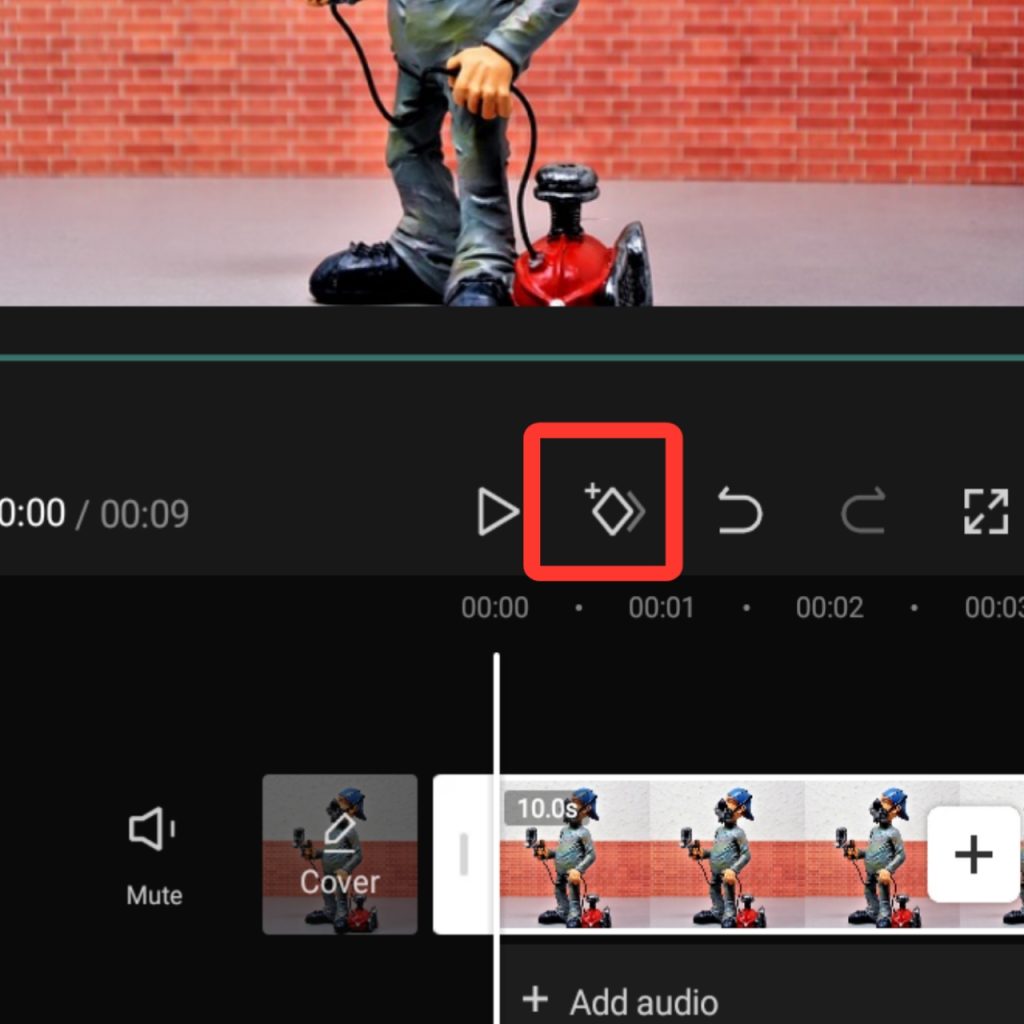
Locate and click on the keyframe icon (a rhombus-shaped button with a positive or plus sign), situated next to the play button.
Text to Images: Free CapCut AI Image Generator
Many would want to remain stucked with their phone not knowing that their knowledge on video editing is limited. It is high time you upgraded. Check this laptop and desktop out if your really want to push to the next level of video editing upgrade.
Step 5: Adjust the Video Timeline
Move the video footage on the timeline to the desired time increment, be it in milliseconds, seconds, or minutes.
Step 6: Manipulate the Object’s Movement

Tap the object on the screen and shift it to the next frame, allowing it to smoothly traverse the video screen.
Repeat steps 5 and 6 until you achieve the desired object movement.
Preview and Finalize
Now, play the video starting from where the keyframes were introduced to observe the changes made. Fine-tune the movements until you are satisfied with the overall effect.
Conclusion
Congratulations! You have successfully learned how to animate objects within your videos using Capcut.
By following the steps outlined in this guide, you can effortlessly create dynamic and engaging content that captivates your audience.
If you have any questions or require further assistance, please don’t hesitate to leave us a message. We’re here to help you excel in your video editing endeavors.
