Cloning is one of the cool effects that has come to stay in Capcut.
Have you ever wondered how people appear two in a particular video scene? Sometimes you argue that they were identical twins.
Well, a good number of the videos you see out there are not twins but cloned videos.
In this blog post, we shall be discussing
- What cloning is all about
- Shooting clips meant for cloning
- Masking during cloning in Capcut
- Role of overlay
- Clone yourself in capcut using a mask (method 1)
- Clone yourself in Capcut using a green screen (method 2)
What is cloning?
Cloning is the ability to make an object appear in two places in one video.
Oxford English Dictionary defined it as “A copy or imitation of something already existing, especially when designed to simulate it”.
When you want to clone an object it means that you want to duplicate such a thing either in a video or elsewhere.
Shooting a cloning scene
For best results, you will need your camera to stand on a steady tripod.
That is to say, you will need a tripod to help you hold your camera and the camera must shoot at the same angle and level.
If you need yourself to appear in two places in the same scene you will need to record all actions separately.
What I mean is that you will need to record each clip individually.
Check the image below for a better understanding.

When you are done shooting the first video clip, you will need to shoot another video clip just like the image below.

Note: to avoid the body of your actor being chopped off during editing, you will need to ensure that your actor stands very far from the position of his clone.
It is always advisable to use markers so that you will know where to step and also eye levels shouldn’t be sidelined.
Masking during cloning in Capcut
Masking is the process of selecting or removing a particular aspect of a video clip to give way to a video behind such a clip. We can also call the video behind “the background.
We are discussing masking here because it plays a big role when you want to clone a video in Capcut.
Role of overlay in Capcut
Overlay in Capcut has been explained here. We need this tool to help us import clips which we shall be adding to our videos.
This tool will help our cloned videos to work properly.
Cloning yourself in Capcut using the masking tool

Here we are on the real business of the day. How to clone yourself in a video using Capcut.
To do this you will need to follow the below step-by-step guide.
Step 1: Launch the Capcut application
You will need to edit your video by first launching the application.
Step 2: Open a new project
Start a new project if you haven’t. If you have already started but stopped halfway feel free to continue from where you stopped.
Step 3: Import your first video
The first video here is a video of where you are standing or sitting (depending on your activity in the shot). This video will also serve as the background of your entire workflow.
Step 4: Tap on Overlay
To make the other video appear in the same timeline as the background of your video you will need to click on the “Overlay” feature to add the other video.
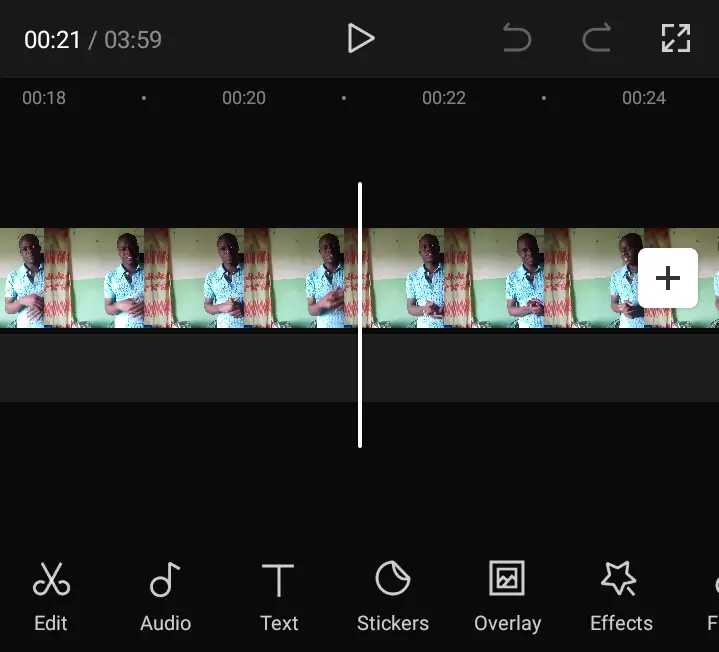
Step 5: Add a second video as an Overlay
The second video will be added through the overlay and it will appear right below the first video that is acting as your background.
Step 6: pinch the overlay video to resize it to your desire
Use your two fingers (the thumb and the index finger) to pinch the overlay video.

Dragging the two fingers close to each other makes the overlay video reduce in size while separating the fingers increases the size of the video.
Feel free to resize the video anyhow you want it.
Step 7: Select mask
Highlight the overlay video by tapping on it. Scroll to the left and find and tap the “Mask” tool.
Step 8: Click on ‘Split’ or any other option

With your two fingers again (the thumb and the index finger), rotate the mask to how you want each video to appear.
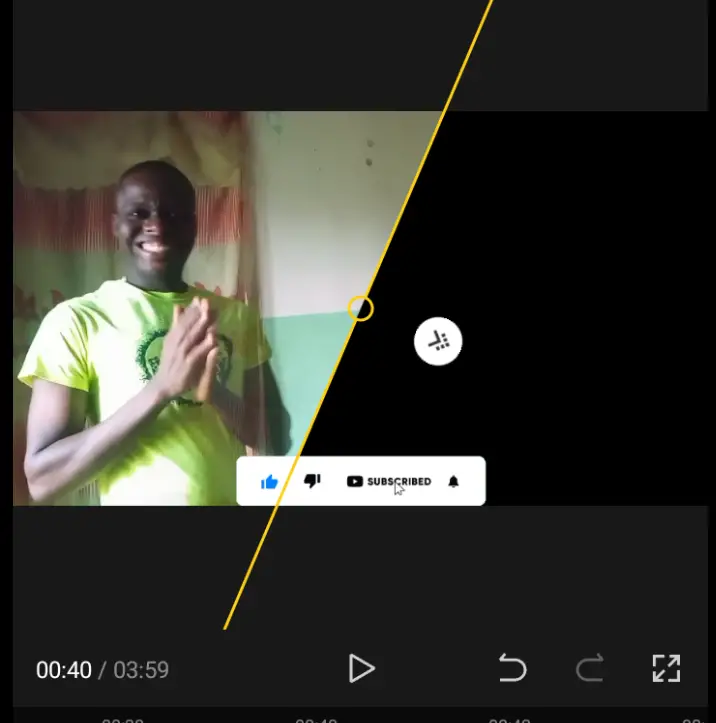
Also, drag the arrow pointing to the right forward or backwards to help blend the meeting points of the two clips.
Step 9: Save and Export
when you are done with your masking click on the tick button on the right-hand side of your mobile to save the masked video.
When you are done with your editing you are free to export your video and also share it for people to watch.
The above is the step-by-step guide on how to edit a cloned video in Capcut using the masking tool.
Below is the second method or another way you can edit a cloned video in Capcut
How to clone yourself in Capcut using a green screen (Method 2)
Here you will need one or more of your videos recorded behind a green screen.
Normally, I would advise that you shoot all your clips on a green screen. And also, shoot on a steady camera mounted on a tripod with the same shooting level and angle.
After that, record an empty background that will serve as the background of your video.
Steps to Clone yourself using a green screen
Before you continue, you are welcome to learn how to remove a green screen (chroma) in Capcut.
Step 1: Import the background of your video
Here, you are required to import the video that will serve as your background after starting a new project.
Step 2: Tap on Overlay
Tap on Overlay and add up the video with the green screen.
Step 3: Remove green background
After adding your green screen video using the “Overlay” feature you will need to remove the green background.
I have made a post on how to remove the green screen of your videos using Capcut.
Step 4: Finish your editing and export the video
If you are satisfied with your editing, you are more than welcome to export your video and share it for the world to see.
Wrapping things up on how to clone yourself in Capcut
With any of the two steps if followed you can unarguably clone yourself while editing with Capcut.
Hope this was helpful. Feel free to share with us your challenges.
