If you are used to the Capcut video editor you will notice it has a curve speed alignment tool.
Curve is a tool in Capcut Speed that enables you to either increase or reduce the speed of your selected video or clip by adding a smooth style to it.
Capcut has two ways of working with speed. The first is Normal while the second is Curve.
Normal is a straightforward way of increasing or decreasing your video speed.
The curve on the other hand though might be difficult to understand by beginners allows you to add style to the speed of your video whether slow-mo or increased speed.
Knowing how to use Curve in slowing or increasing the speed of your video goes a long way in making your video appear more attractive and engaging.
Types of Curve in Capcut Speed
The curve has four options or types namely; Custom, Hero, Mortage and Bullet.
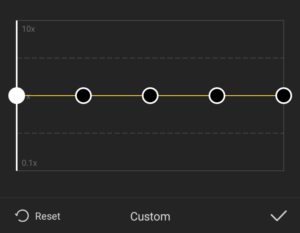
- Custom: Aligns the speed in a normal situation and allows you to manipulate it to your desire.
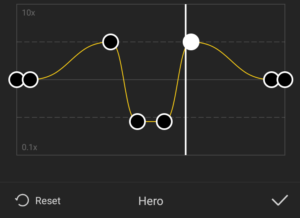
- Hero: Hero is designed in a way that the speed moves from normal to increase. It gradually returns to slow motion. From the slow-mo, it gradually returns to a high speed and finally returns to a normal speed. You can manipulate the movement of your video by tapping and holding on to any of the balls and dragging it to whatever speed level you so desire.
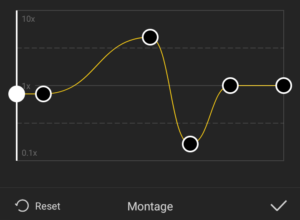
- Mortage: Another speed aligner in Capcut is mortage. From the image below you will notice how the speed of the object in the video should follow. The speed here moves from normal to high. It gradually returns to a slow-mo and finally returns to normal. You are welcome to manipulate this speed curve by tapping and holding any of the balls.
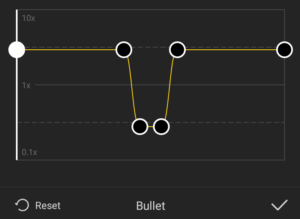
- Bullet: the last speed curve in Capcut is Bullet. The image will also tell you how the speed of your video will go if you allow it to be like that. The speed of the video here moves from high to low and back to high again. You are welcome again to tap and hold any of the balls to manipulate them to your desire.
How to use Normal Speed in Capcut
To use the Normal Speed aligner, you will need to;
- Launch the Capcut app
- Click on New project or select the already existing clip you were working on.
- Tap on the video clip you want to add the video effect on.
- Tap on Speed
- Select Normal
- Drag the tiny ball forward to give you a fast movement or drag the tiny ball backwards to give you a slow-mo effect.
- Export your video or continue with your editing.
That is the way you can use the Normal Speed aligner in Capcut.
Read Also: how to convert text to speech in Capcut
How to use the Curve speed aligner in Capcut
As you already know, Capcut Speed is divided into two which are Normal and Curve.
Having discussed what the Normal Speed is all about, let’s talk about how to use the Curve speed aligner.
ALSO READ: How to blur a video background in Capcut
To use this option you will need to;
- Launch the Capcut app
- Select New Project or any already existing video
- Tap on the video you want to add the speed effect on.
- Select the Curve option.
- Select one among Custom, Mortage, Hero and bullet.
- Drag the tiny balls up or down to give you the speed effect that you want.
- Export or continue your editing when you are satisfied with the speed effect.
So that’s it.
Conclusion
A curve speed aligner is the best way to work with speed if you want to add special effects to your slow-motion or increased speed.
Though the Normal Speed aligner is a straightforward tool, its option cannot be compared to Curve.
Hope this was helpful. Feel free to leave us a comment